How to Stream Computer Audio and Microphone on Mac Using Blackhole

Since the COVID-19 lockdown started, one of the things I do to stay connected with friends is by playing games virtually. One of the most popular ones, which I also own, is Jackbox Games. We would all join a video conference call (eg. Google Meet or Zoom) together, I would share my screen with the game on it and everyone else joins using their phone. This works for the most part, except for one part: the audio. Since the game audio (or more generally, my computer audio) is being played through my speakers and getting recorded by my mic, there can potentially be a lot of noise or distortion, which isn’t ideal. After some googling, I learned that streaming computer audio on a Mac is a bit more tricky than Windows, but I managed to find a solution. Here is a tutorial on how to stream both the computer audio and your voice for any major video conferencing app (eg. Zoom, Google Meet, Discord, Skype etc).
BlackHole
I recommend using BlackHole as it is a free application that supports the latest macOS (Catalina). This was developed as a replacement to SoundFlower, and similar to its predecessor, it is a virtual driver that you configure to route audio between apps.
Step 1:
Download the installer. Follow the instructions here for how to install BlackHole.
Step 2:
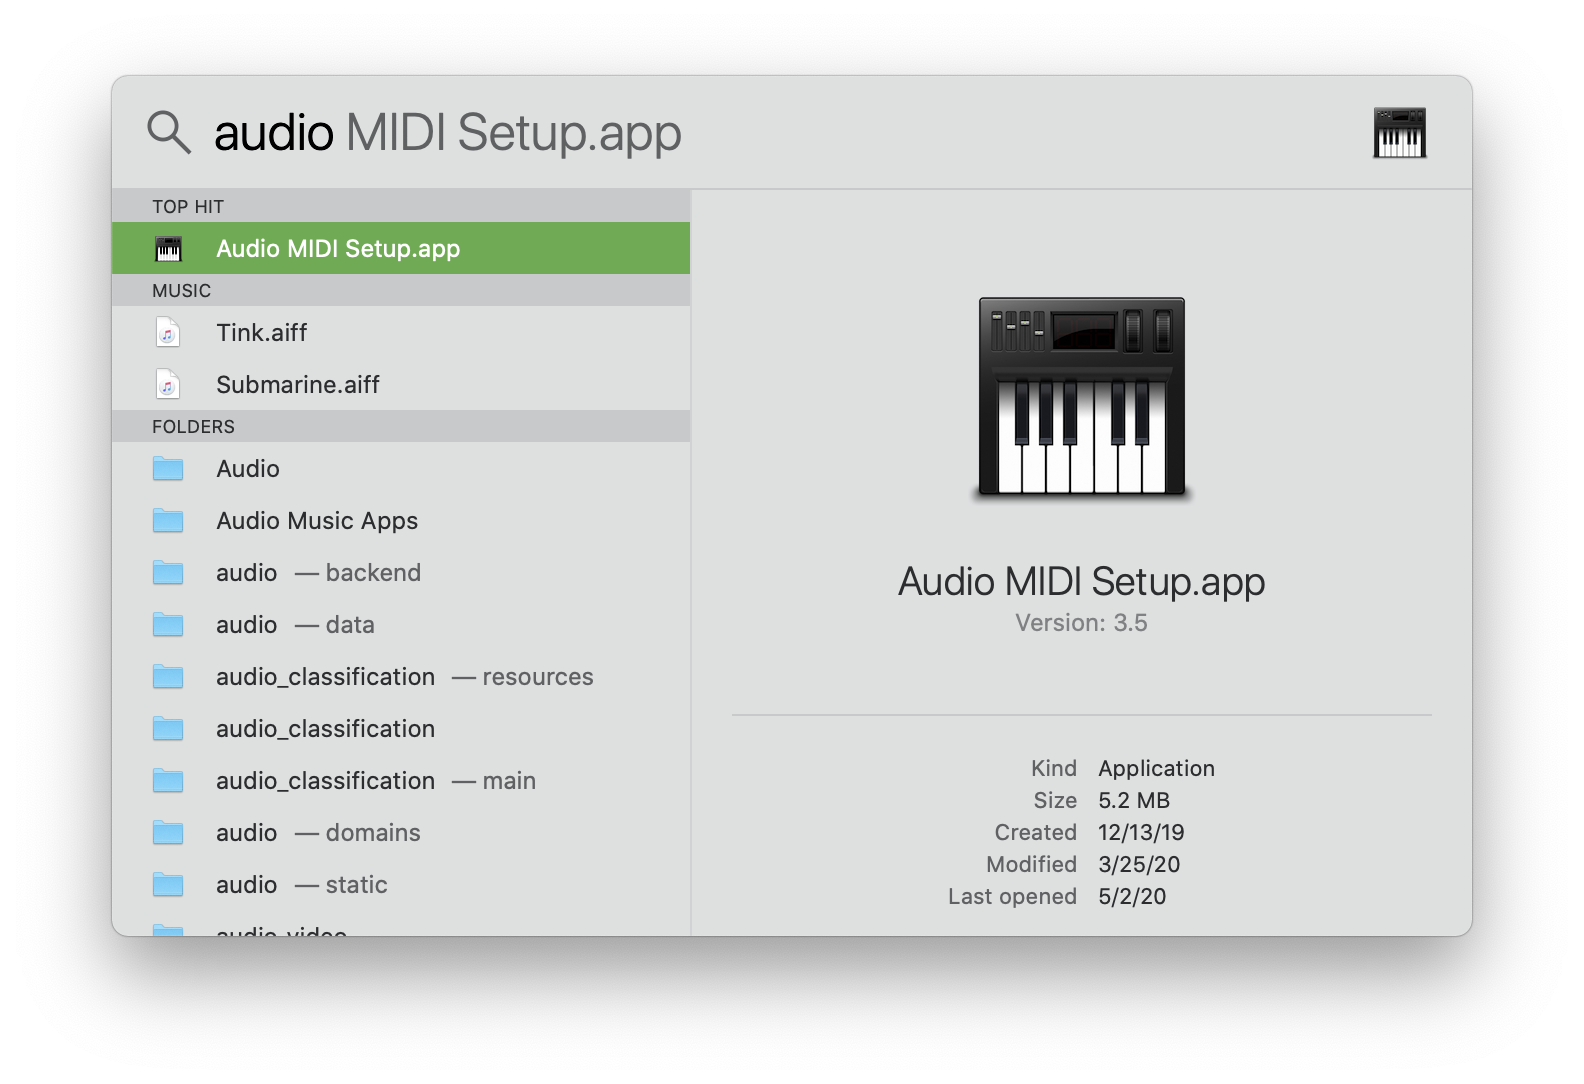
Use Launchpad or Spotlight to open the Audio MIDI Setup app. The app should look like this:
Step 3:
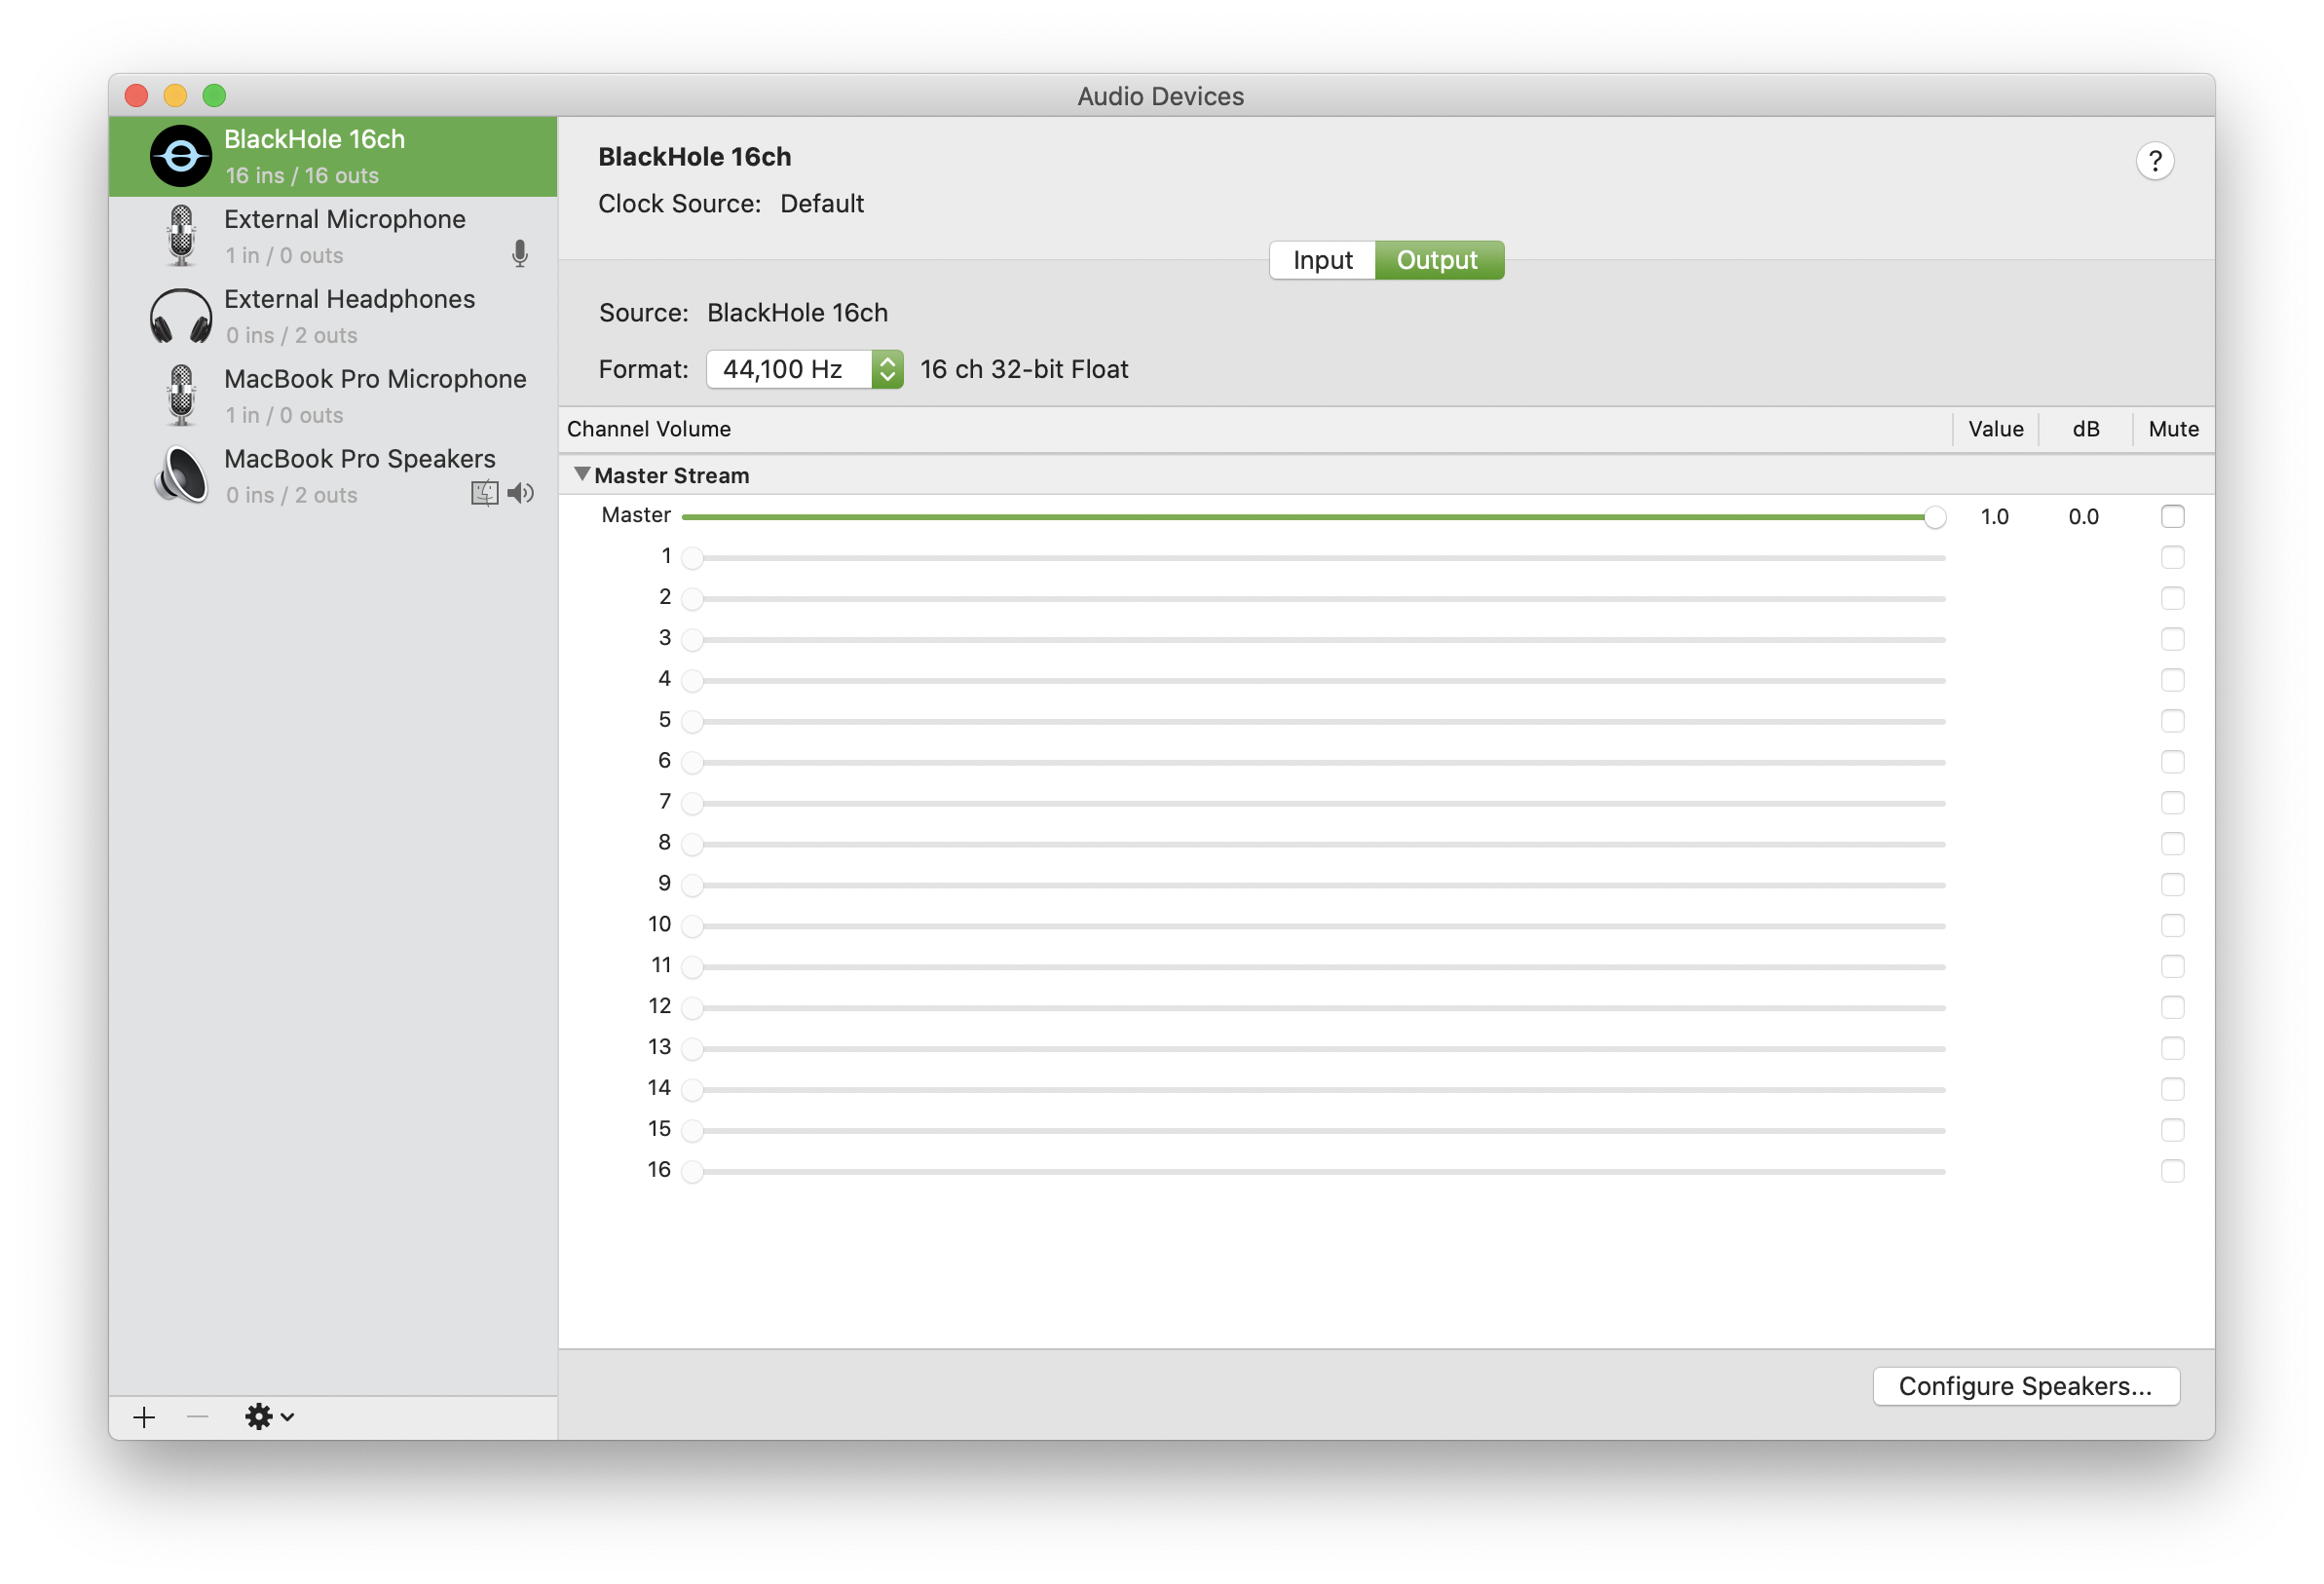
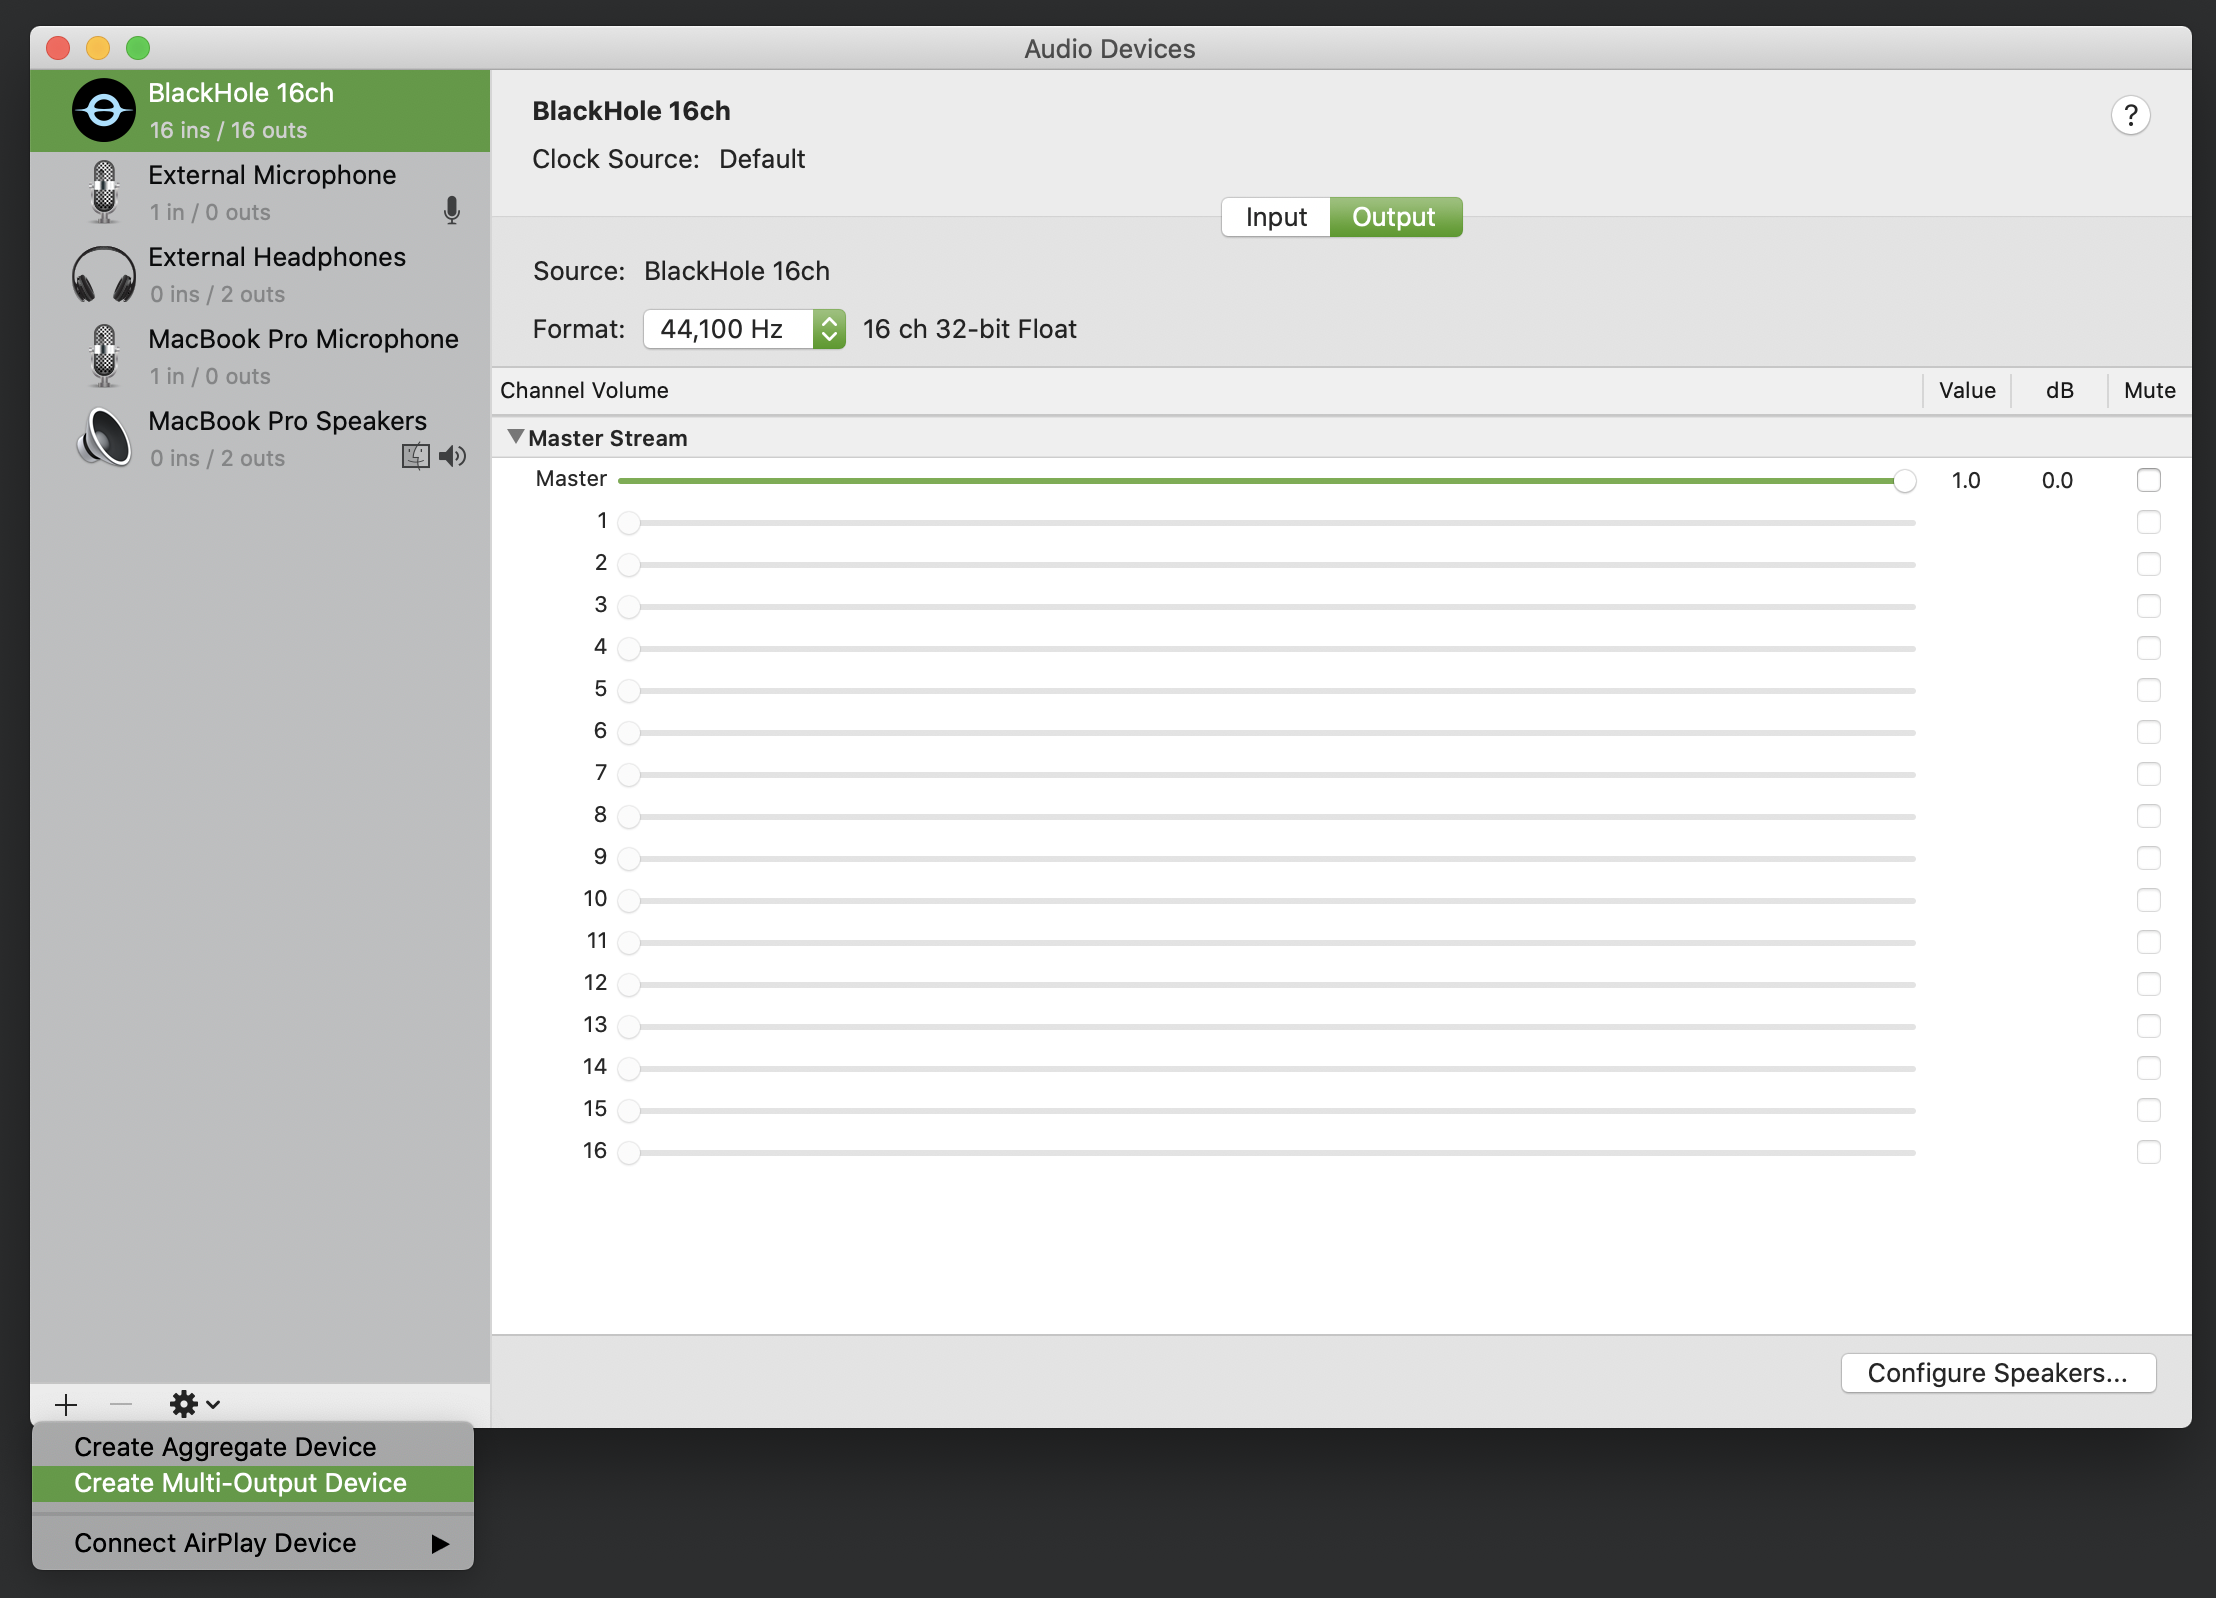
Open the app and you should see a list of audio devices, including the newly-installed BlackHole 16ch. The device list may look different depending on what macOS you have and your setup. If you are on macOS 10.14 or older, then you will see Built-in Microphone and Built-in Output where as for 10.15 (Catalina), it will show MacBook Pro Microphone and Macbook Pro Speakers like the screenshot below. Note that I have plugged in my own set of headphones which is why they’re also displayed here separately as “External Headphones” and “External Microphone”.
 At the bottom left side of the window, there is a + icon. Click on that and you will see a drop-down menu. Select “Create Multi-Output Device”.
Step 4:
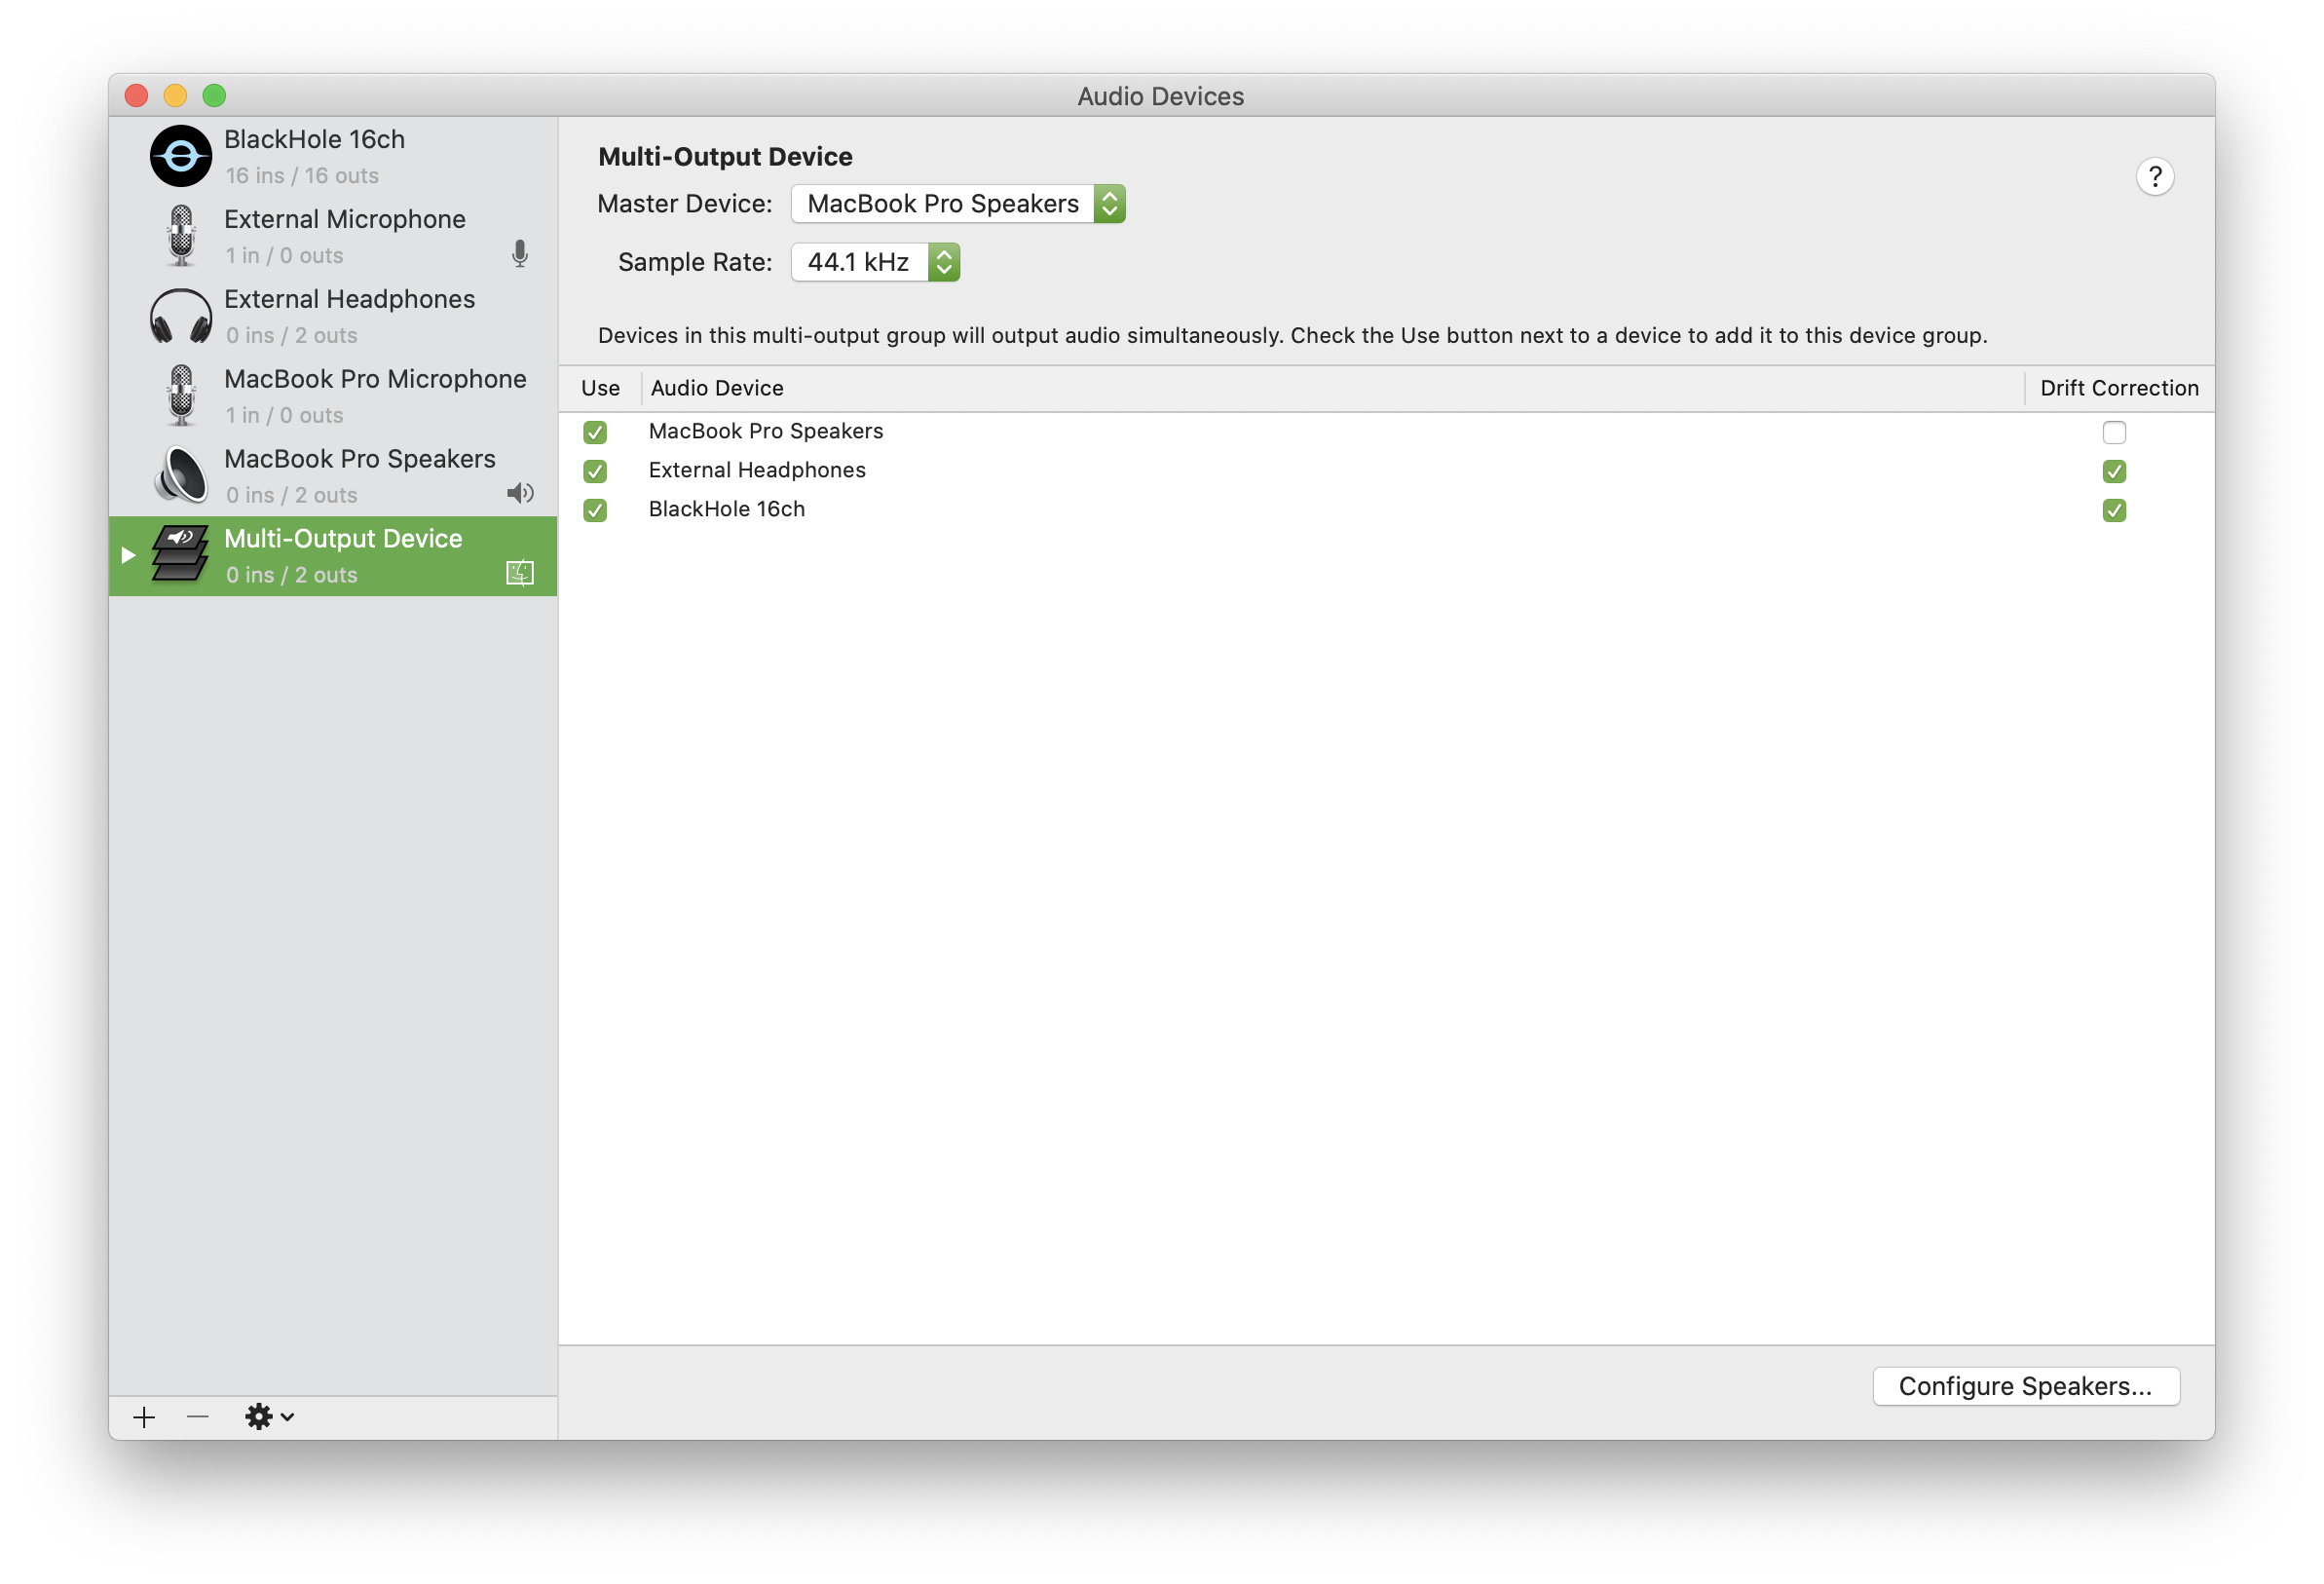
You should see a list of devices that you can enable for the Multi-Output Device. A Multi-Output Device outputs the audio to all of the enabled devices. For example, if you enable your headphone and the Macbook Pro speaker, then if you play something, for example a video, the audio will come out from both the headphone and the speakers.
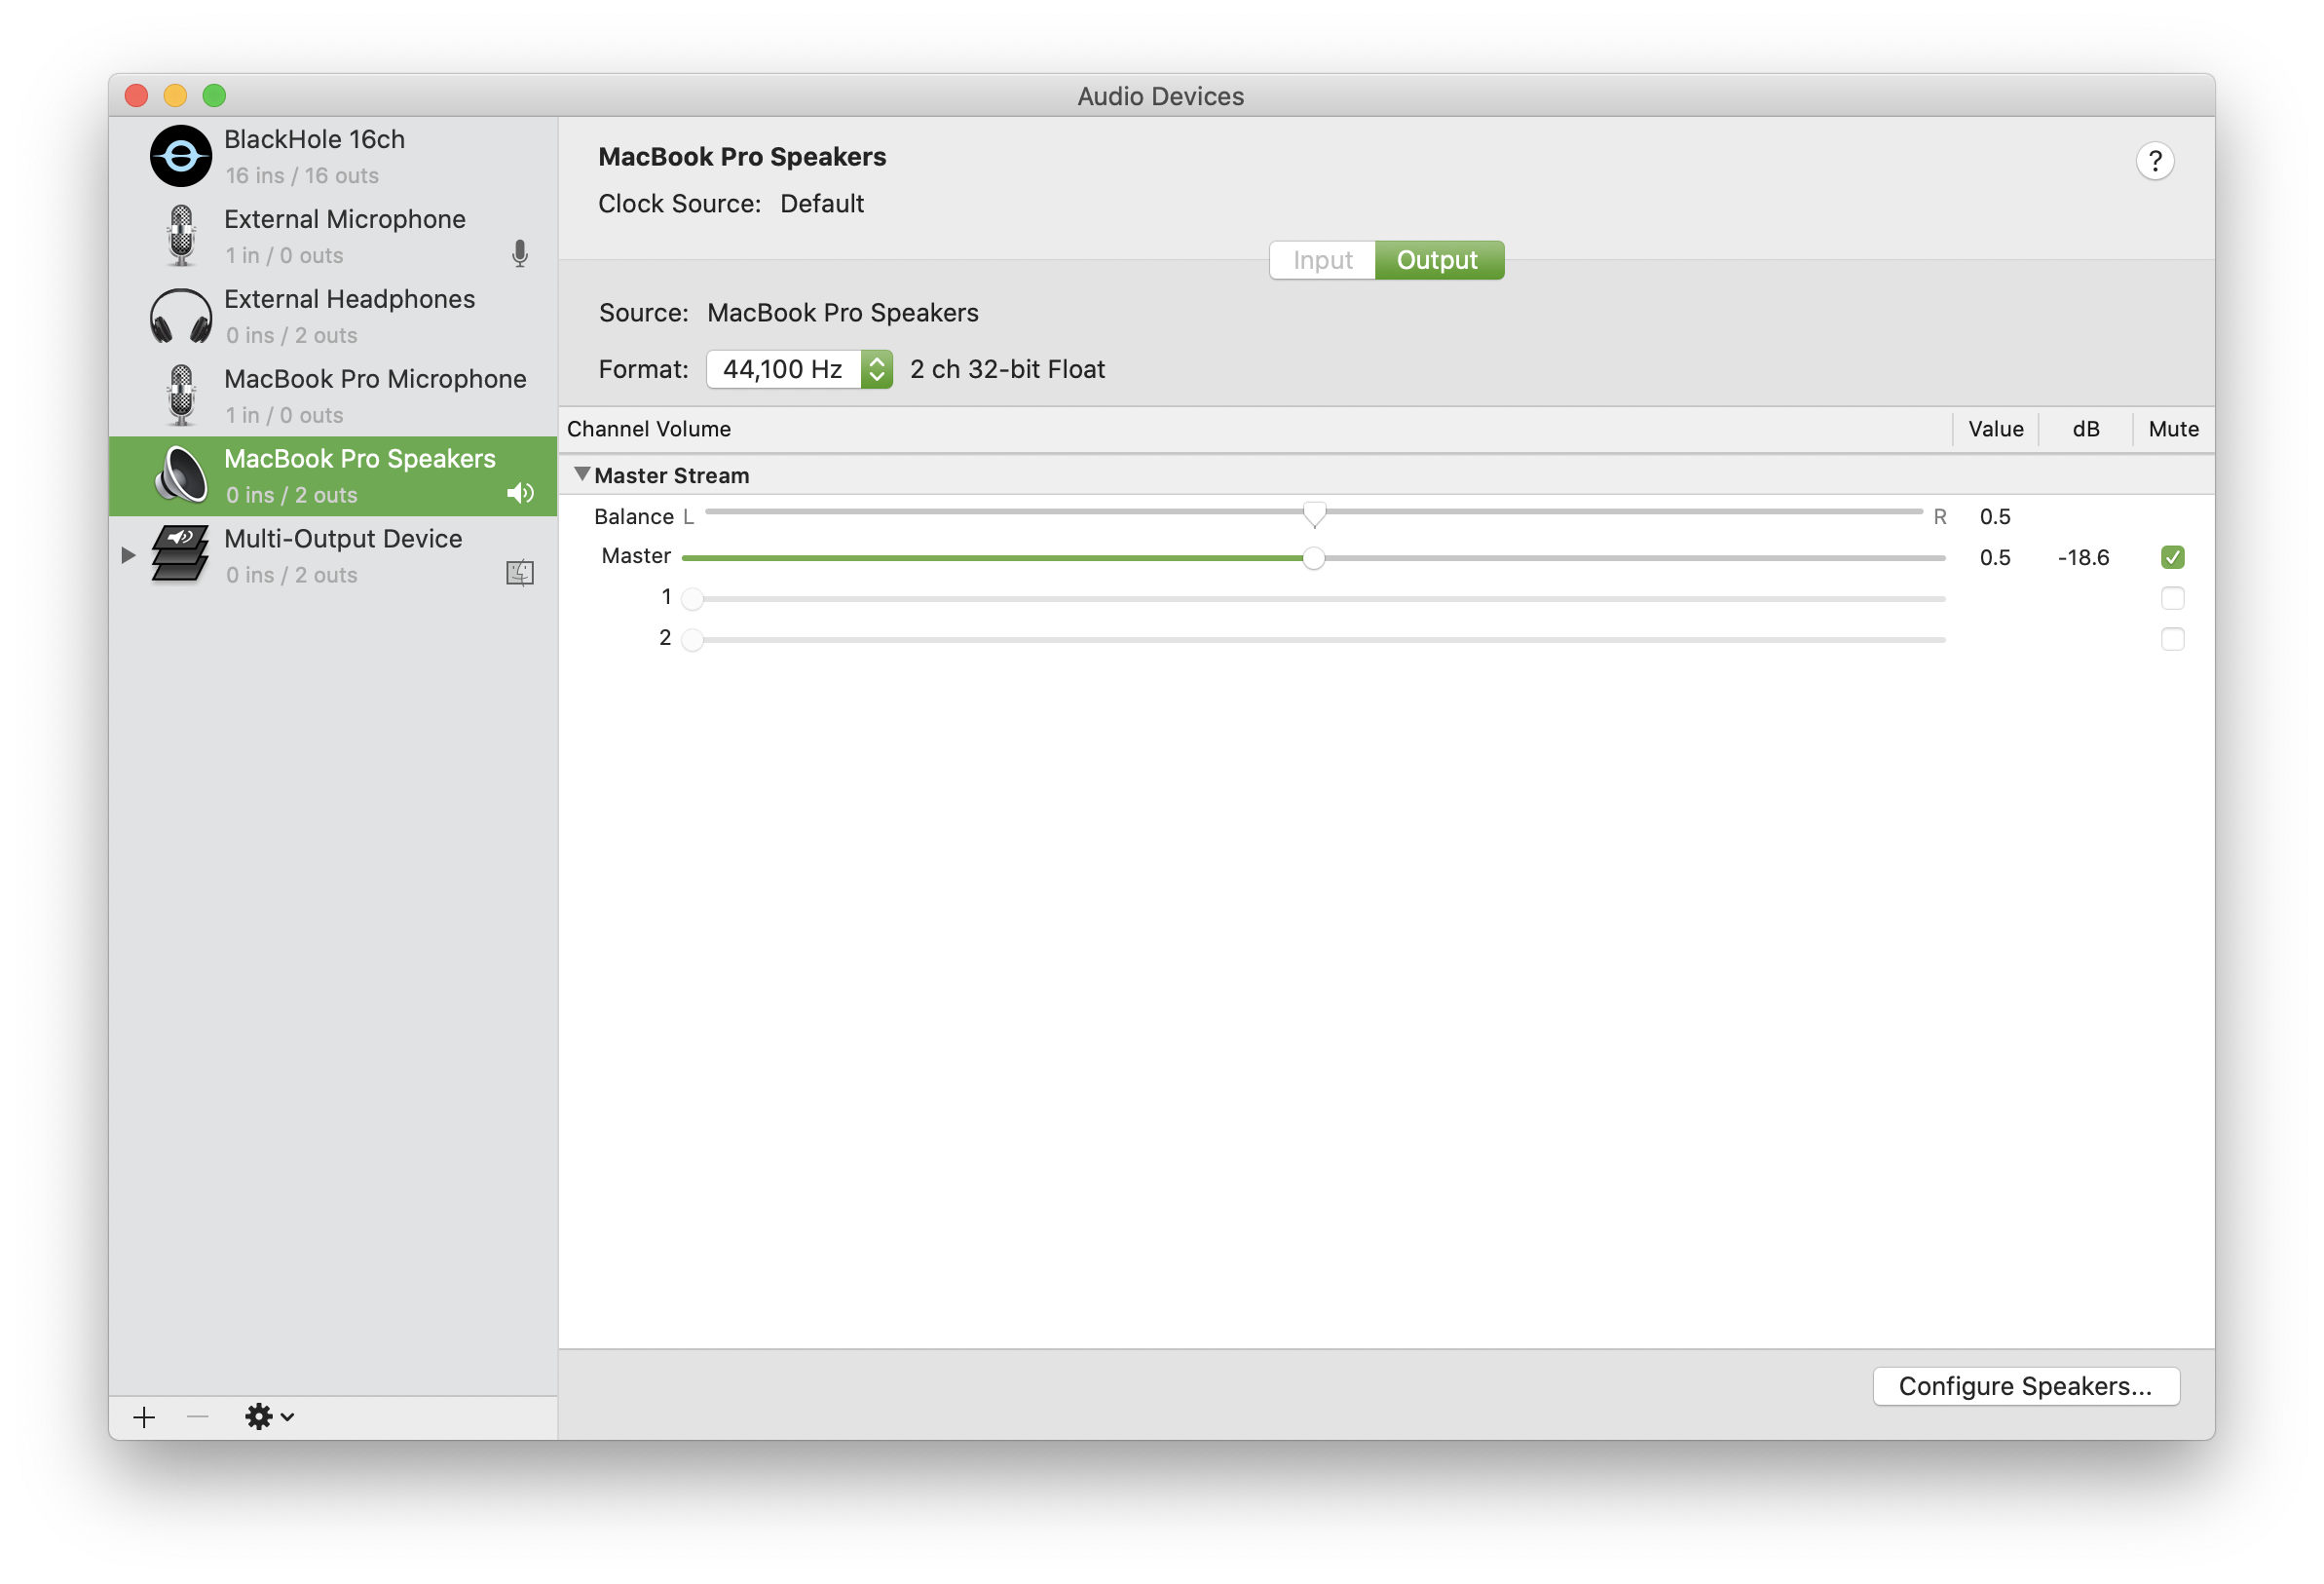
Configure the setting similar to the screenshot below. Due to issues with the macOS, the Built-in Output or MacBook Pro Speaker must be listed as the top device in the Multi-Output. If you have an external headphone connected and do not wish to play the audio through the Built-in Output/Macbook Pro Speaker, then you can mute it by clicking on that device and checking “Mute” in the box on the right.
Step 5:
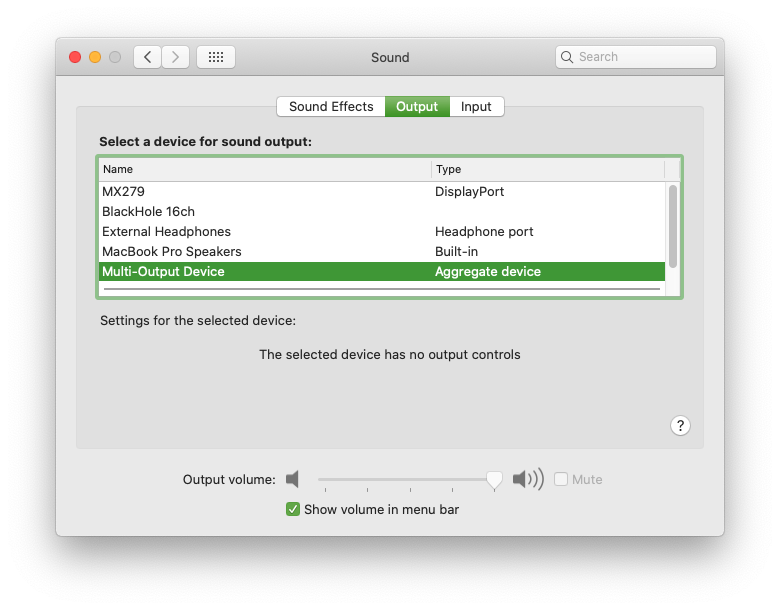
Right-Click on the newly-created Multi-Output Device, and select “Use This Device For Sound Output”
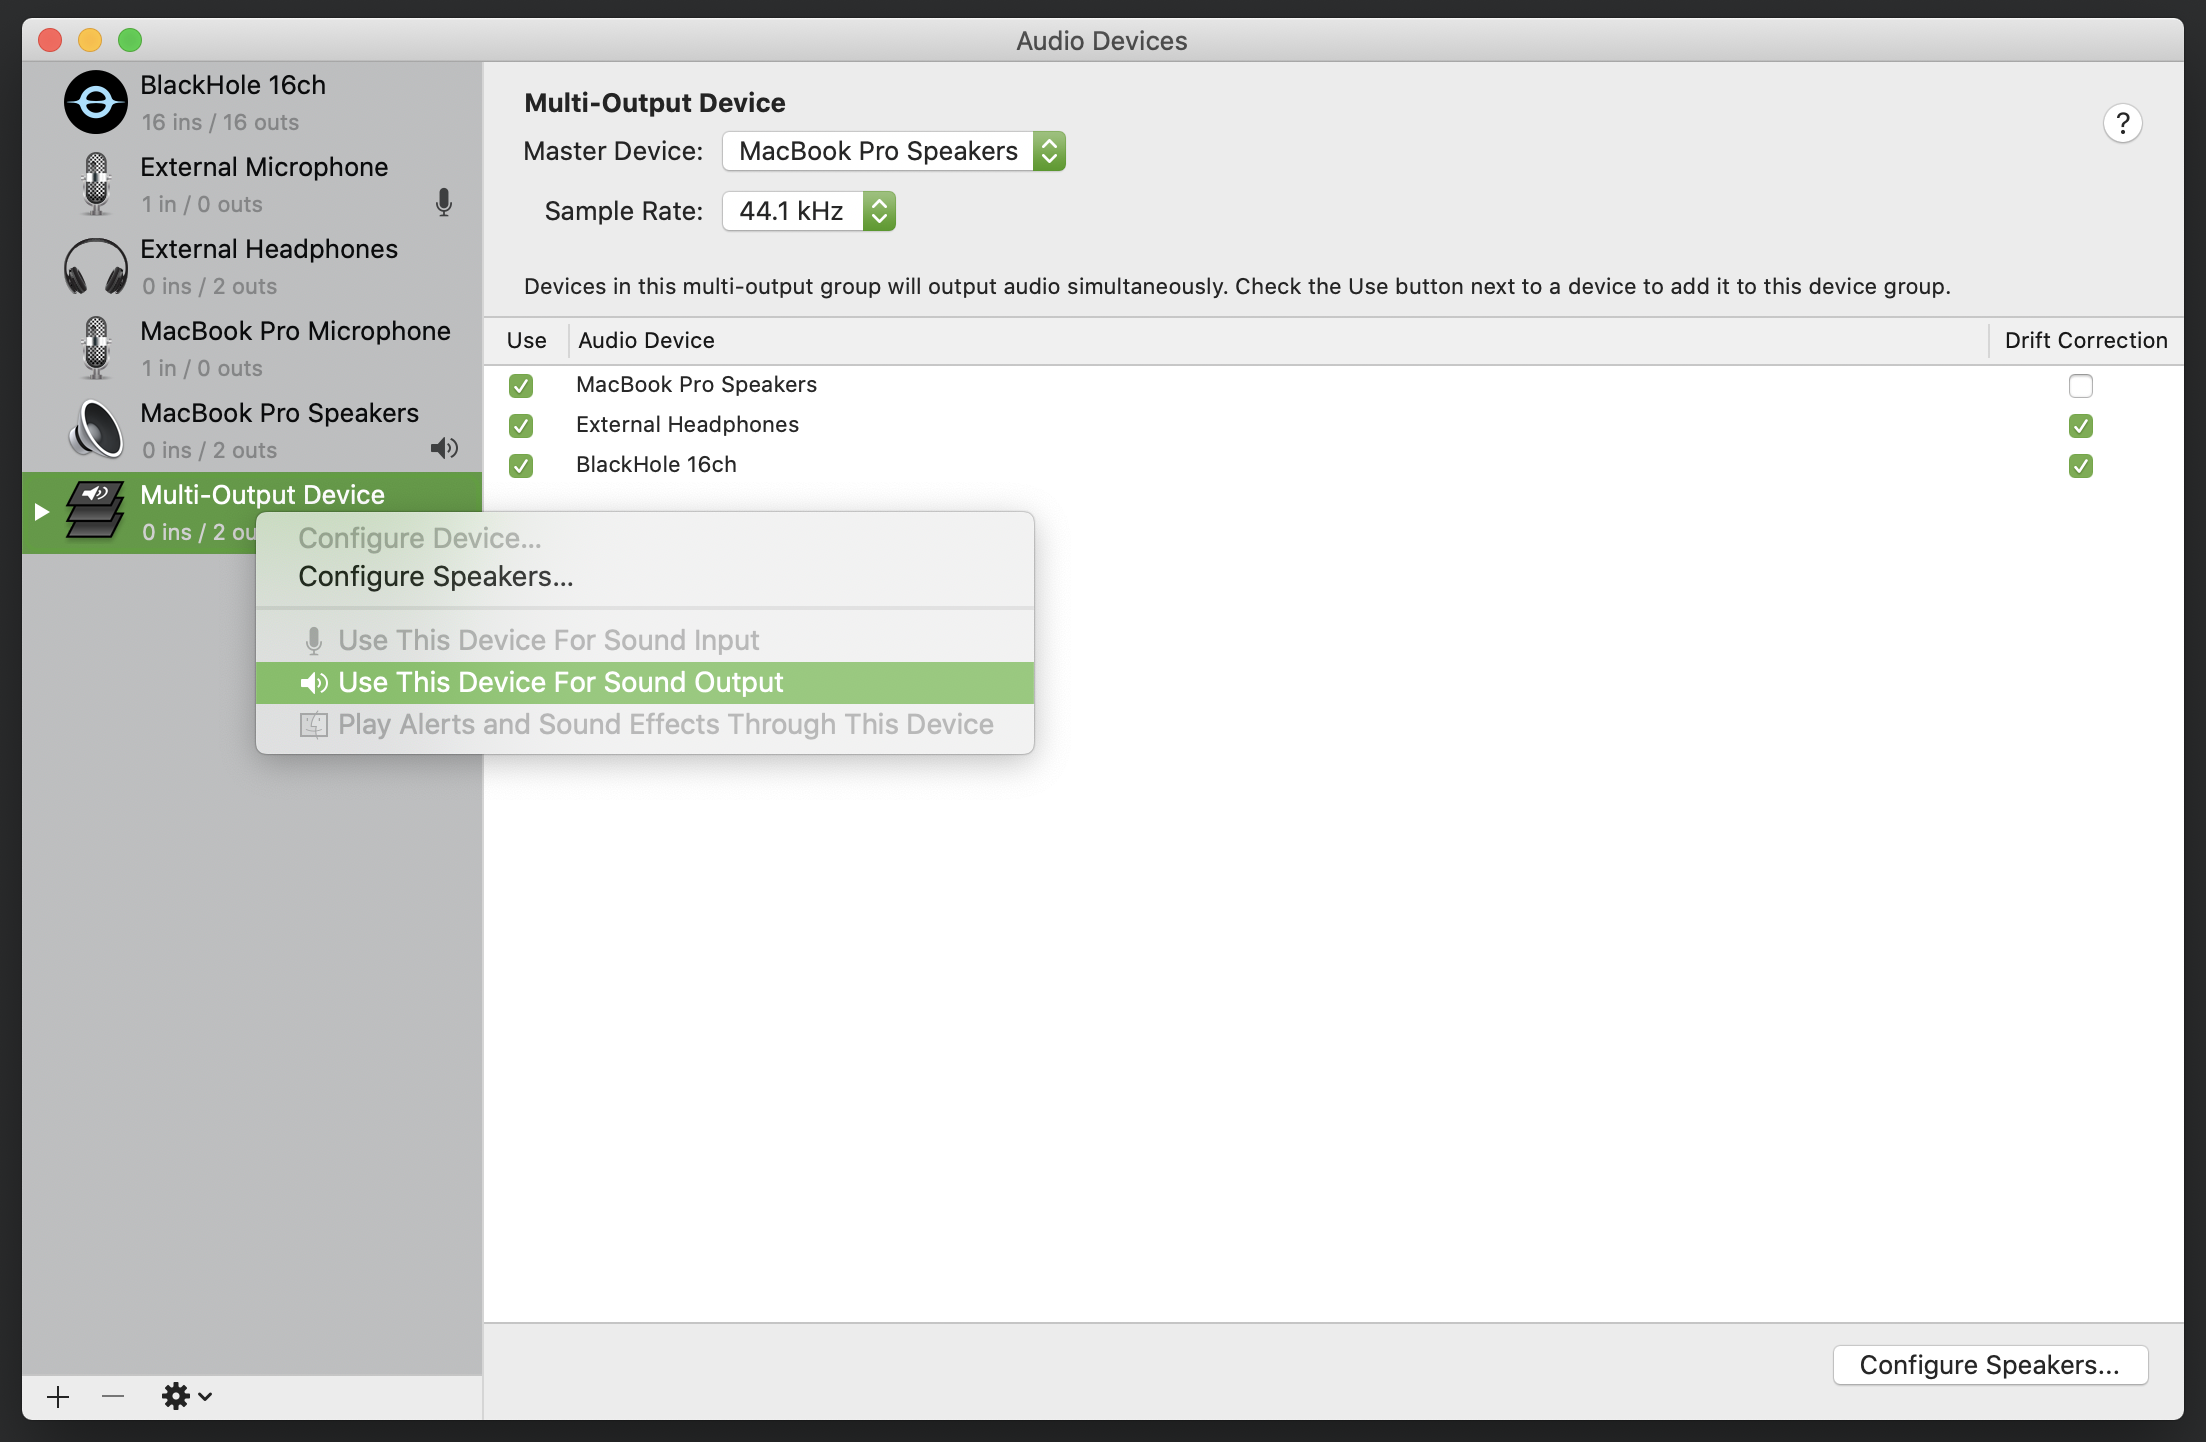
Alternatively, you can also configure it in the Sound Setting under System Preferences by clicking on it:
Step 6:
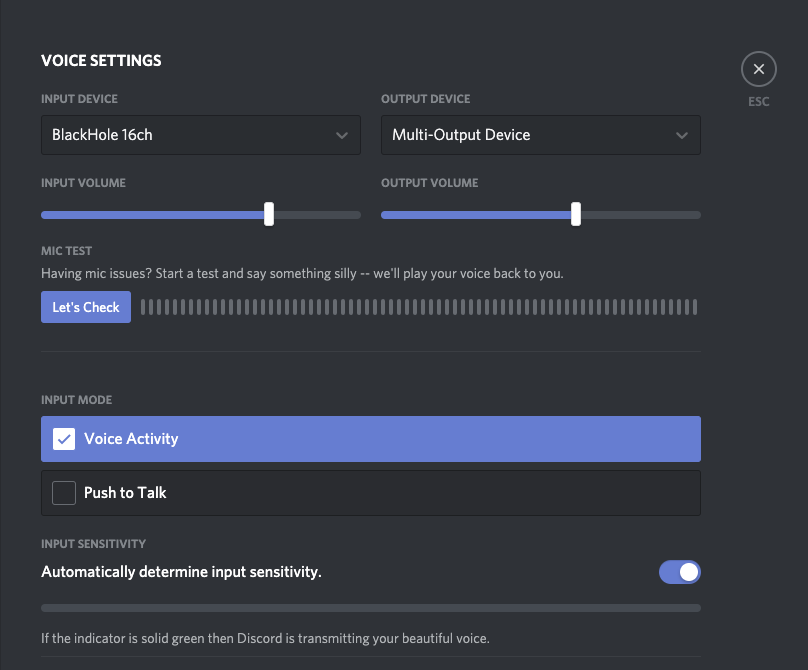
Open the app you use for video call. I used Discord for this example, as it is great for streaming videos. In the Audio setting, make sure you select BlackHole 16ch as the Input Device and Multi-Output Device as the Output Device. Now play a video (eg. on Youtube) and the person on the other side of the call should be able to hear it.
But it Doesn’t Detect My Microphone/Voice! What to do?
Since you’ve changed the input on the video conferencing app to BlackHole, it can no longer get the input from your microphone. In order to be able to stream both your microphone audio AND the system audio, we need a workaround. This is where we need the help of another app - a DAW or a Digital Audio Workstation. A DAW is a general term for applications that you use for recording and editing audio. For this example, we will be using Garageband as it is a free app that comes with the macOS, but the same concept is applied for other DAW as well.
- Open Garageband, select “Empty Project” on the prompt.
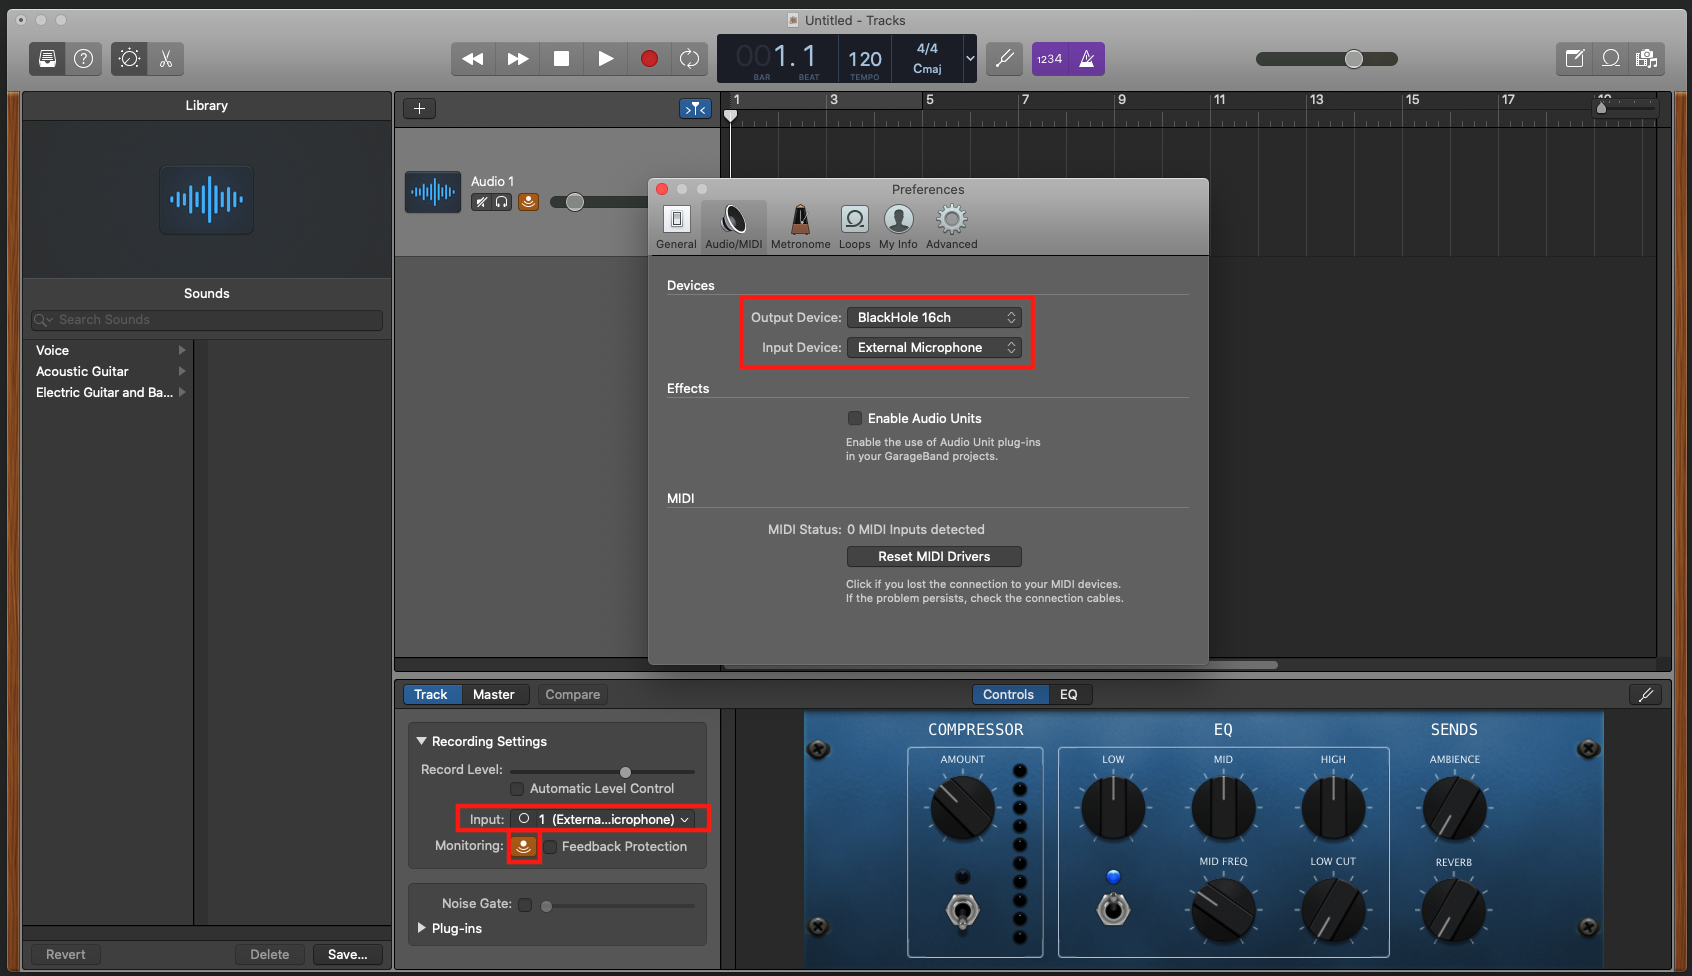
- Go to Track -> New Track, and select “Audio Track”. You will see something like the screenshot below.
- In the highlighted “Input” section, select the microphone you are using. For my case, I have selected “External Microphone”.
- Enable Monitoring for that track as highlighted in the screenshot below. The button showing as orange means that monitoring is enabled.
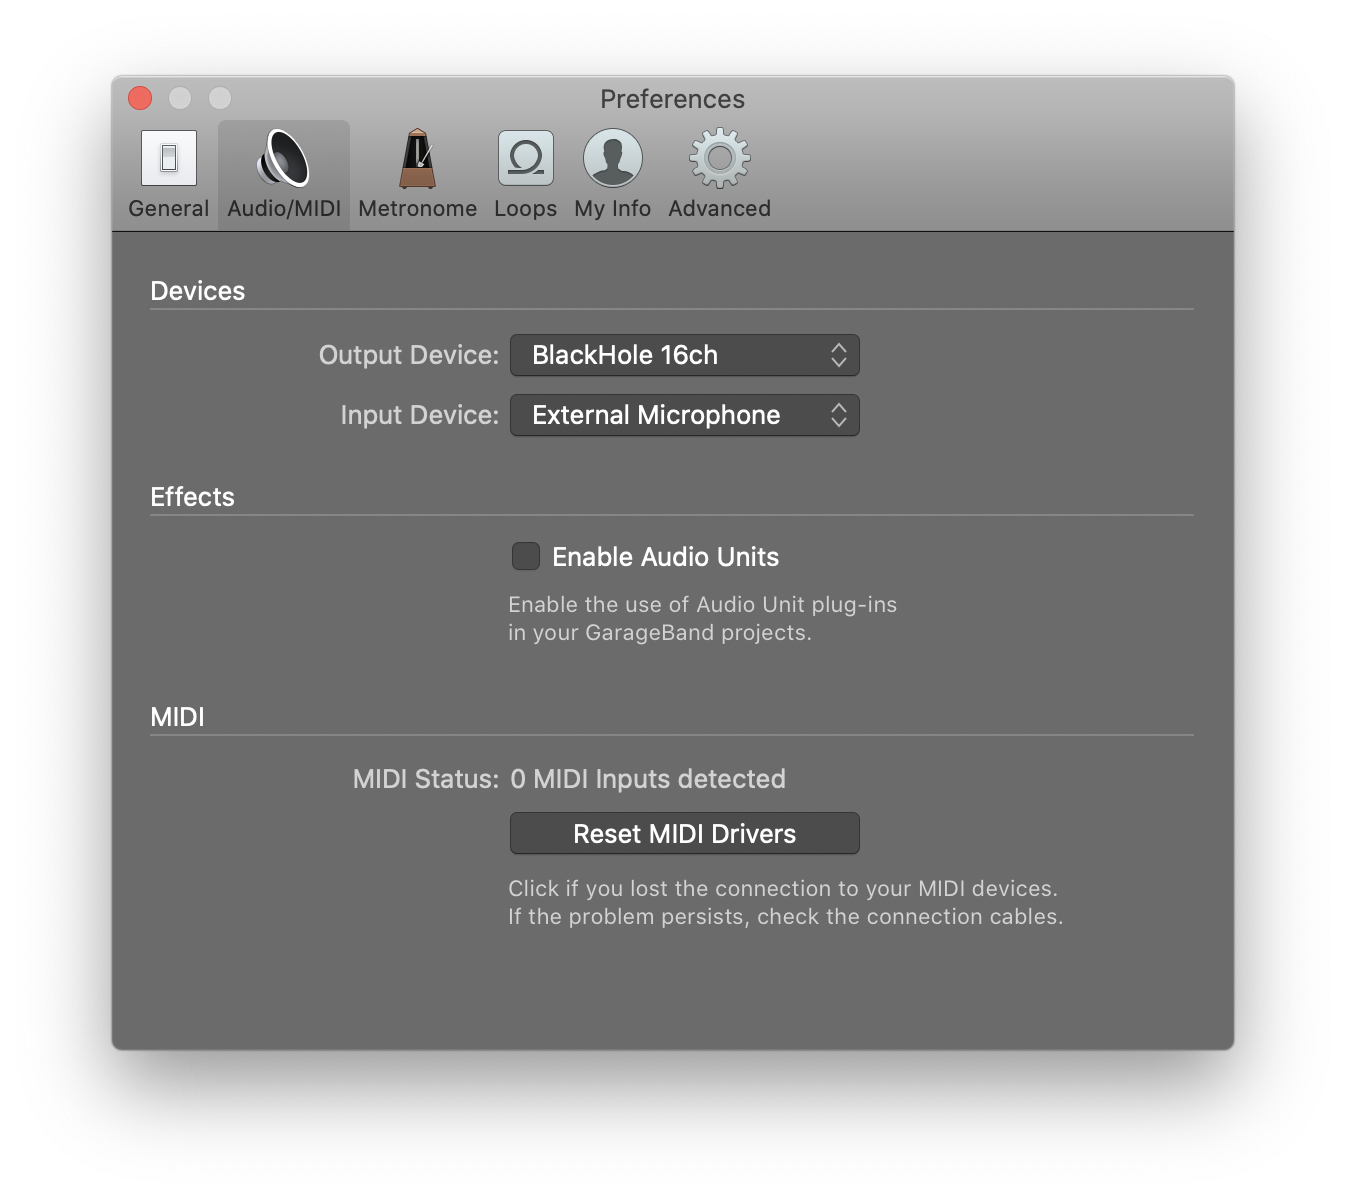
- Go to GarageBand -> Preferences. Select Audio/MIDI and then configure the setting like the screenshot below. Input Device is the microphone, whereas the Output Device is BlackHole 16ch.
- Note that to adjust your microphone level, simply turn up the level inside GarageBand, not the level in the Audio MIDI setup. It’s helpful to do a sound check with someone using the video conferencing app to make sure they can hear your voice.
 Voila! Now people on the other side of the call should be able to hear both your computer audio and your voice, so you can stream all the Jackbox Games you want without needing to worry about sound quality. If you have headphones plugged in you also don’t need to worry about disturbing your neighbours. I hope this can help improve your entertainment experience and stay connected with family and friends during this troubling time.
Leave a comment